
Disclaimer: The guide will only cover the hardware side of computer UHD optical drives. You will need to look elsewhere for instructions on usage of a UHD drive with a computer.
If you’ve ever wanted an Ultra High Definition Blu-ray drive for your computer, right now is the time to get one. With Pioneer pulling out, there’s now only one company left making UHD drives (Hitachi-LG), and I don’t see them continuing for long. Prices on highly desirable drives are already starting to shoot into the stratosphere of $200+, far outside the reach of everyone but enthusiasts. But what if there was another way?
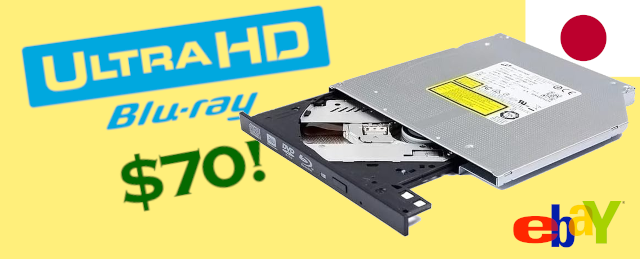
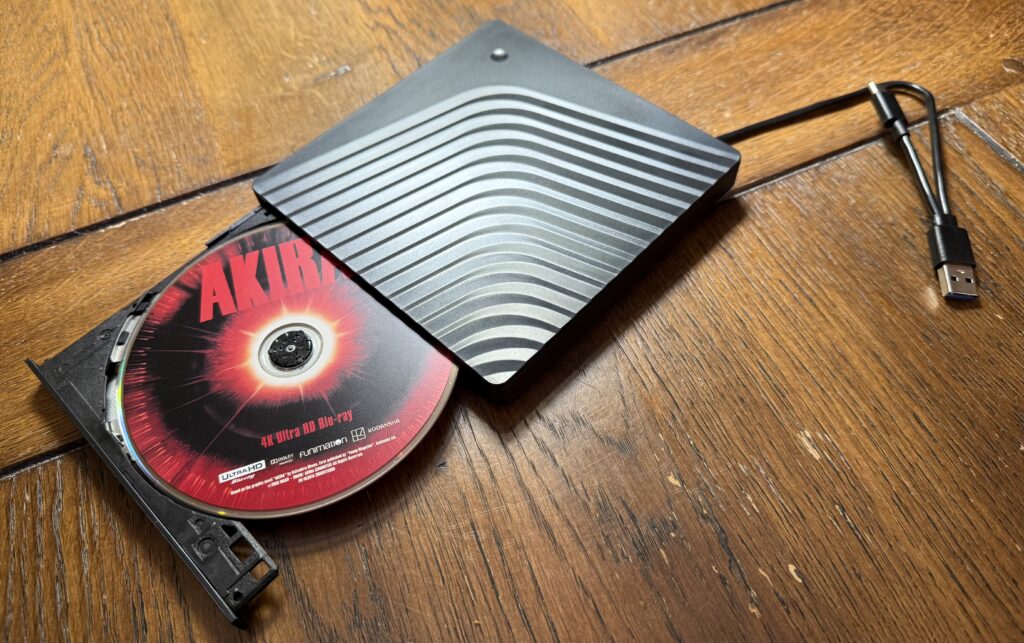
As of the time of this article’s publication in June 2025, you can assemble a fully-functional external UHD optical drive that will work with any disc you throw at it for $70 or less. The secret to this is the HL-DT BU40N.
What to buy
The HL-DT BU40N (also branded up as Hitachi-LG, HL-DS or HL-DT-DS) is a 9.5mm internal UHD drive designed for laptops that was released (as far I can tell) around 2015. It may not be the fastest or most reliable UHD drive ever made, but it’s compatible with pretty much every single optical disc format from the last 25 years (including BDXL and M-Disc), and can even burn UHD Blu-rays. And right now, you can get a bare, lightly used BU40N for less than $50 on eBay.
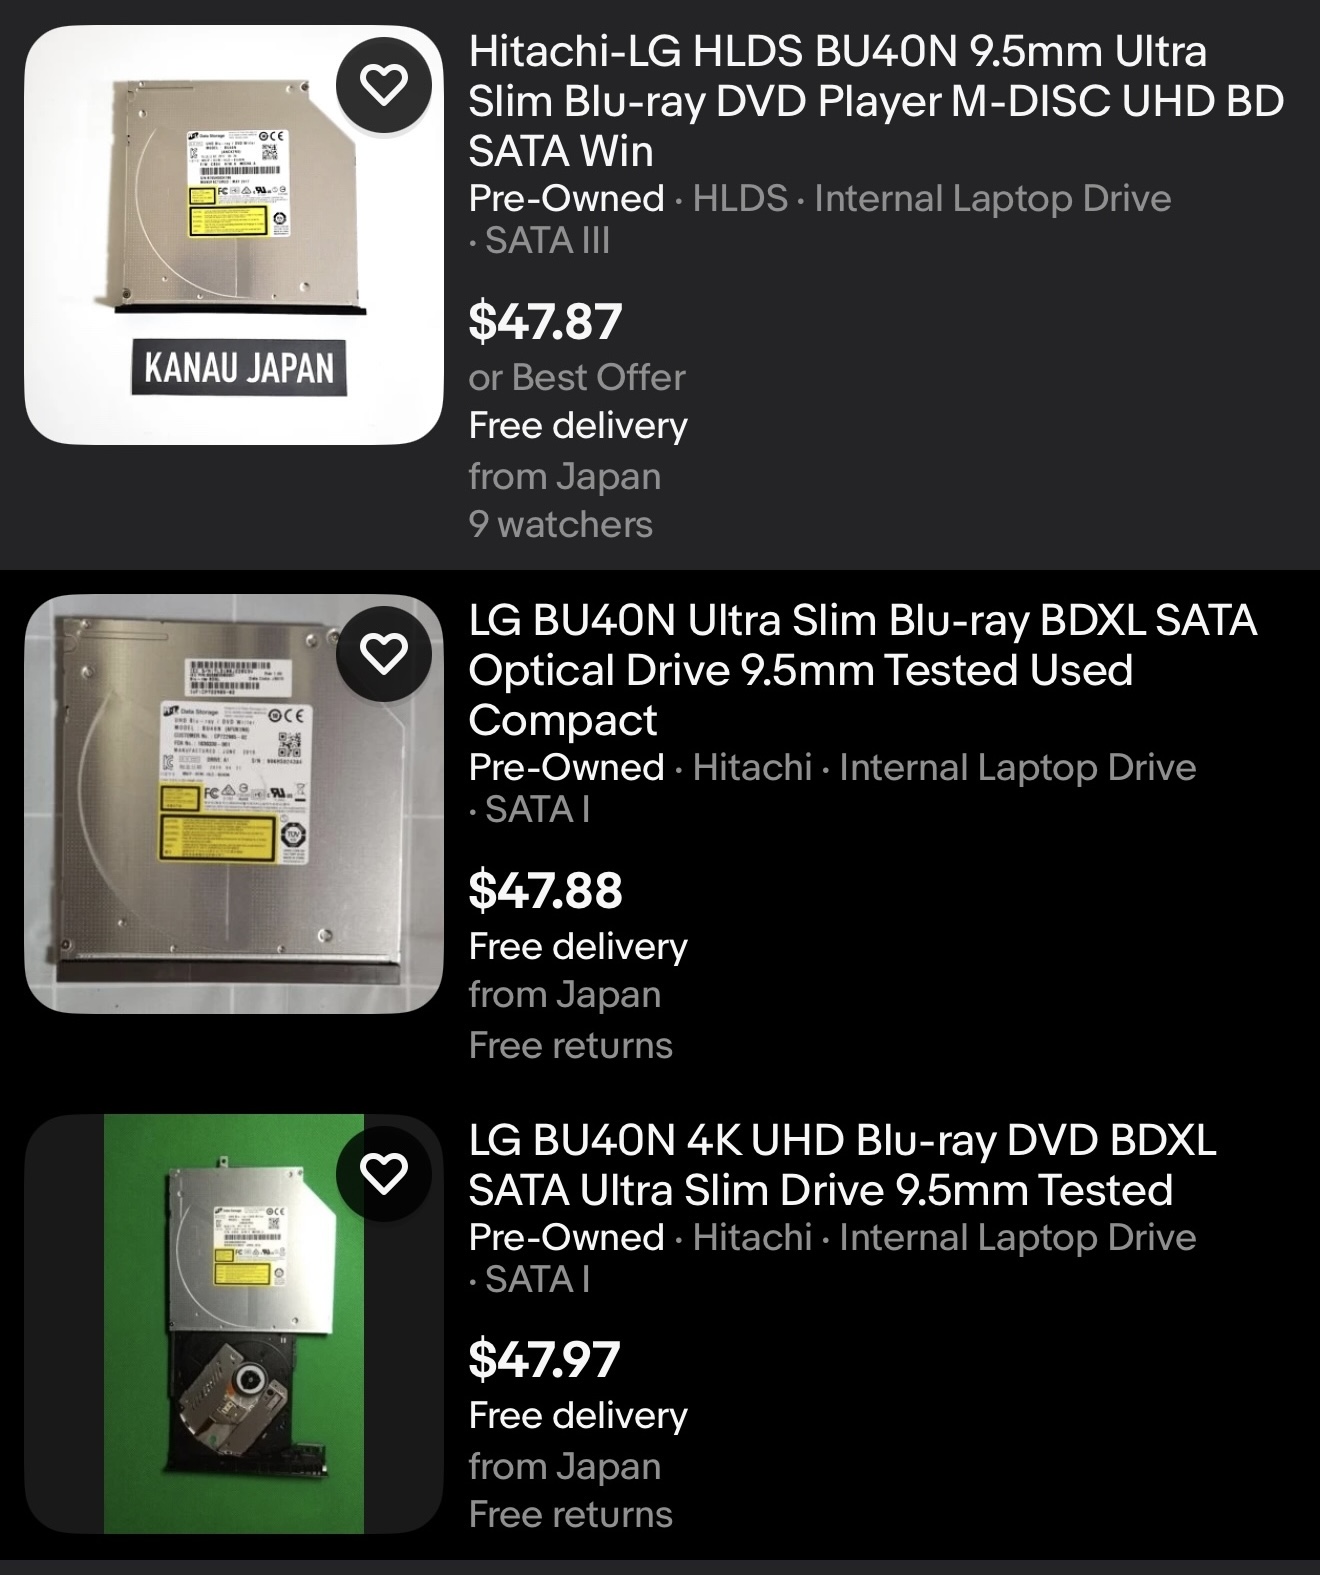
It’s unclear exactly why, but at the time of this article’s publication, hundreds of BU40Ns, all “lightly used,” and all either lacking a bezel or with a laptop-specific one have started to pop up on eBay. Almost all are coming from Japan, and most show a manufacturing date of late 2019. It’s quite likely a number of Japanese companies are doing a 5-year hardware refresh, and these drives were pulled from retired laptops, possibly never even used once. If so, this glut of drives isn’t likely to last, and I doubt we’ll ever see UHD drives this cheap again. I purchased one in May 2025 for roughly $45, postage included.

But that’s just a bare drive, possibly with an ugly bezel. Unless you have a laptop old enough to have an optical drive you could swap out, a bare drive on its own is likely useless, which is where the next item comes in: a 9.5mm optical drive enclosure.
There are a number of these flooding Amazon, eBay, and AliExpress, and pretty much any of them will work. The only requirement is that they’re. 9.5mm tall, not 12.5mm. You can make the drive work in a 12.5mm enclosure, but it won’t be pretty or reliable. Despite what the enclosures may claim, all but the most expensive are actually USB 2.0 inside, but this is less of a big deal that you may think. A UHD BD can max out at 144Mb/s of read speed, which is still significantly less than the 480Mb/s USB 2.0 can provide, much less the 5Gb/s USB 3.0 can. I paid about $8 for my enclosure, with postage from China, but this unfortunately will vary quite dramatically with tariffs and availability.
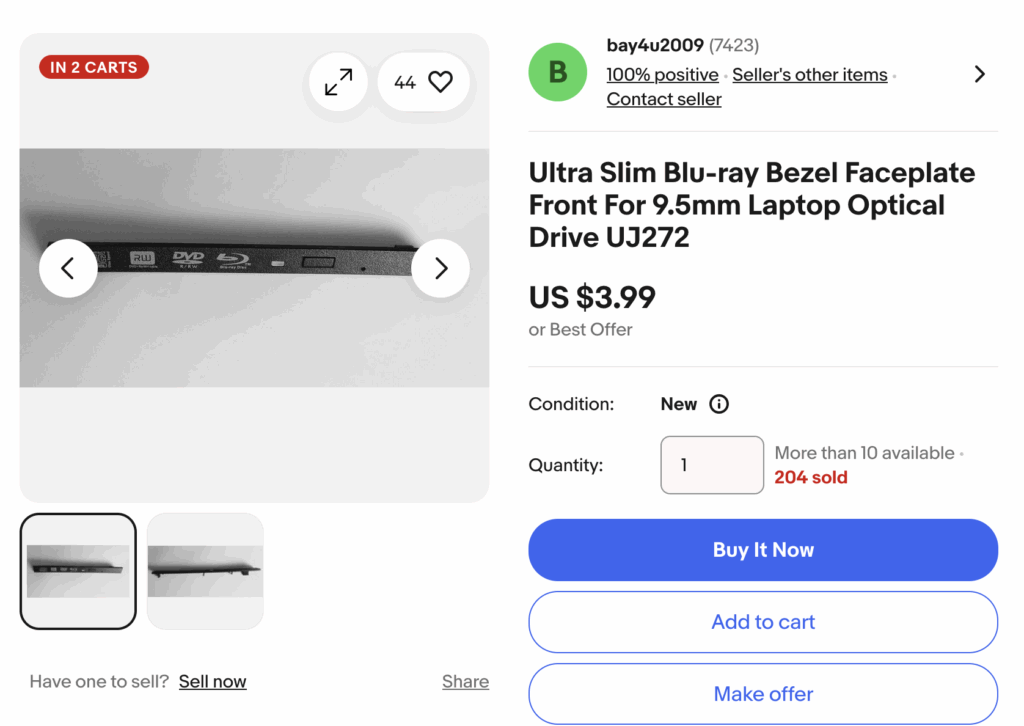
Finally, the bezel. Depending on which listing you bought your drive from, your drive may or may not have included a bulky, oddly shaped laptop-specific one like mine did. While you technically could just roll with the one it came with, replacement bezels are thankfully available, and not (too) expensive. I got my replacement bezel from this eBay listing, and paid about $12 with postage for it, but the price seems to be swinging wildly in response to tariffs. This particular listing was chosen because it specifically mentions that it’s compatible with the BU40N, as drive bezels are not universal. The seller also claims the bezel works for a whole host of other drives, so if this particular listing goes down, bezels for the Panasonic UJ-152, UJ-162, UJ-172, UJ-242, UJ-252, UJ-262, UJ-272, or UJ-273, HL-DT BU10N, BU20N, BU30N, or BU50N, or Pioneer BDR-UD02 or BDR-UD03 should (in theory) also work. A free bezel was included with the enclosure I ordered, but the clips appeared to be in slightly different positions, and I didn’t want to risk damaging the drive by trying to force it into place.
Putting it together

Once all your parts have arrived, it’s assembly time. All you should need is a towel (paper is fine), #1 or #0 Phillips screwdriver for the case, and a flathead screwdriver of essentially any size for the bezel. The entire process should take less than 15 minutes.
To replace the bezel, the first step is getting the optical drive to eject. If you have a sewing needle or similarly-sized pin, you should be able to manually eject the drive by inserting the pin into the small eject hole on the front of the bezel. If you don’t have a pin, you can have the drive eject itself by temporarily installing it in the enclosure, connecting it to a computer, and pressing the eject button. Either way, you want to get to a state where the platter has been released from the body of the drive.
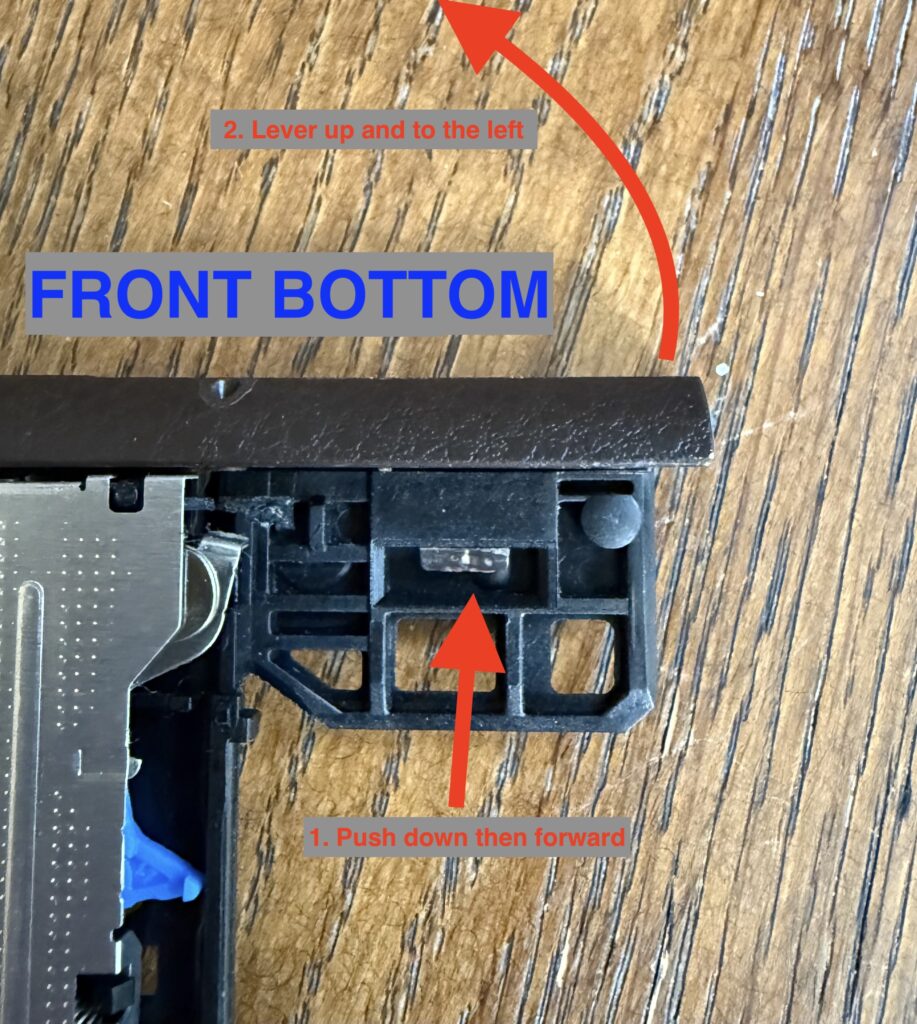
Next, flip the drive upside down, and place it on the towel to prevent any possible scratches to the laser assembly. With the drive positioned upside down and the tray ejected forwards, you want to focus on the top right corner of the tray, the part that sticks out like an arm. At the tip of this “arm”, there’s a large plastic clip that holds on the front bezel. Use the flathead screwdriver to push down and forward on it to release the bezel, while supporting the other side of the “arm” with something solid (like a finger). Be careful you don’t crack any other clips while undoing the main one.

Once the main clip has been released, push up on it like a lever (not straight up). There are 2 clips near the center that should release normally, and a hook at the far left end that will release as you continue to rotate the lever up and towards the left. Once the bezel has been removed, double check that all 4 clips are still present, and haven’t broken off inside the drive.
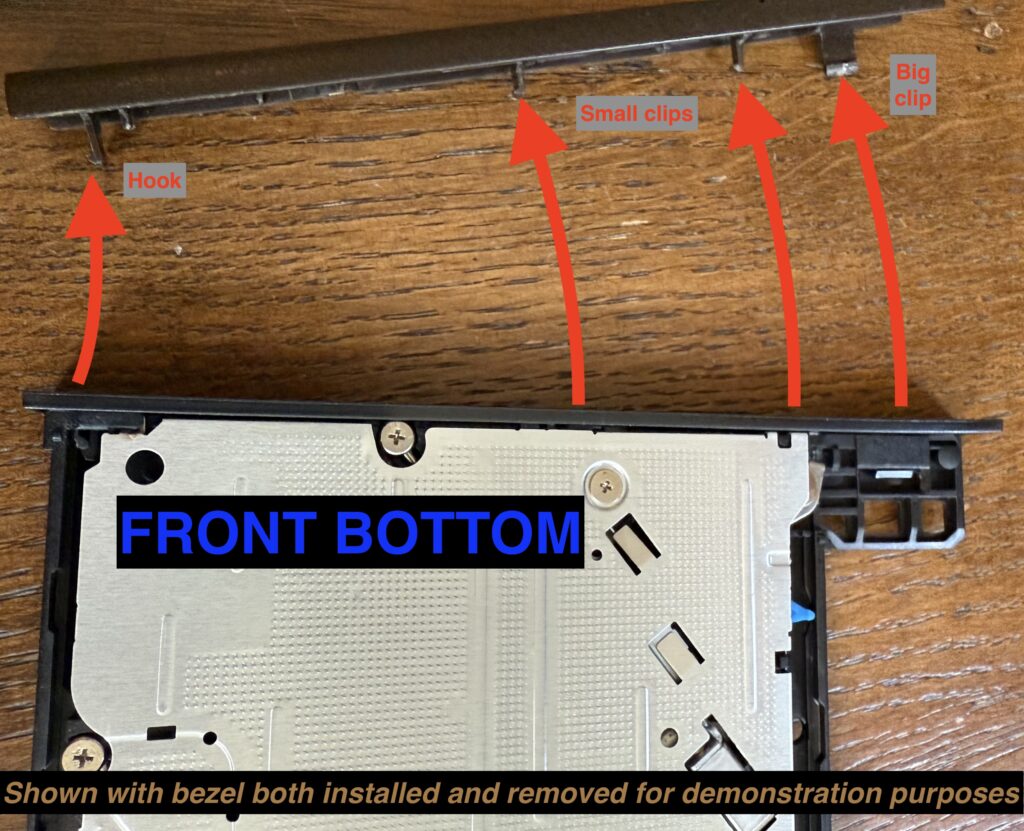
To install the new bezel, first make sure it’s the right way up, with the text upside-down to match the currently upside-down drive. Start by engaging the hook at the left end of the bezel, and rotate it into place, followed by the 2 center clips, and finally the lathe clip at the end. If you did this correctly, there should be no gap between the edge of the drive and the bezel.
Next step is the enclosure. There are dozens of different models of enclosure available for sale, but most of the cheap plastic ones are assembled roughly the same way, even if they look different externally.
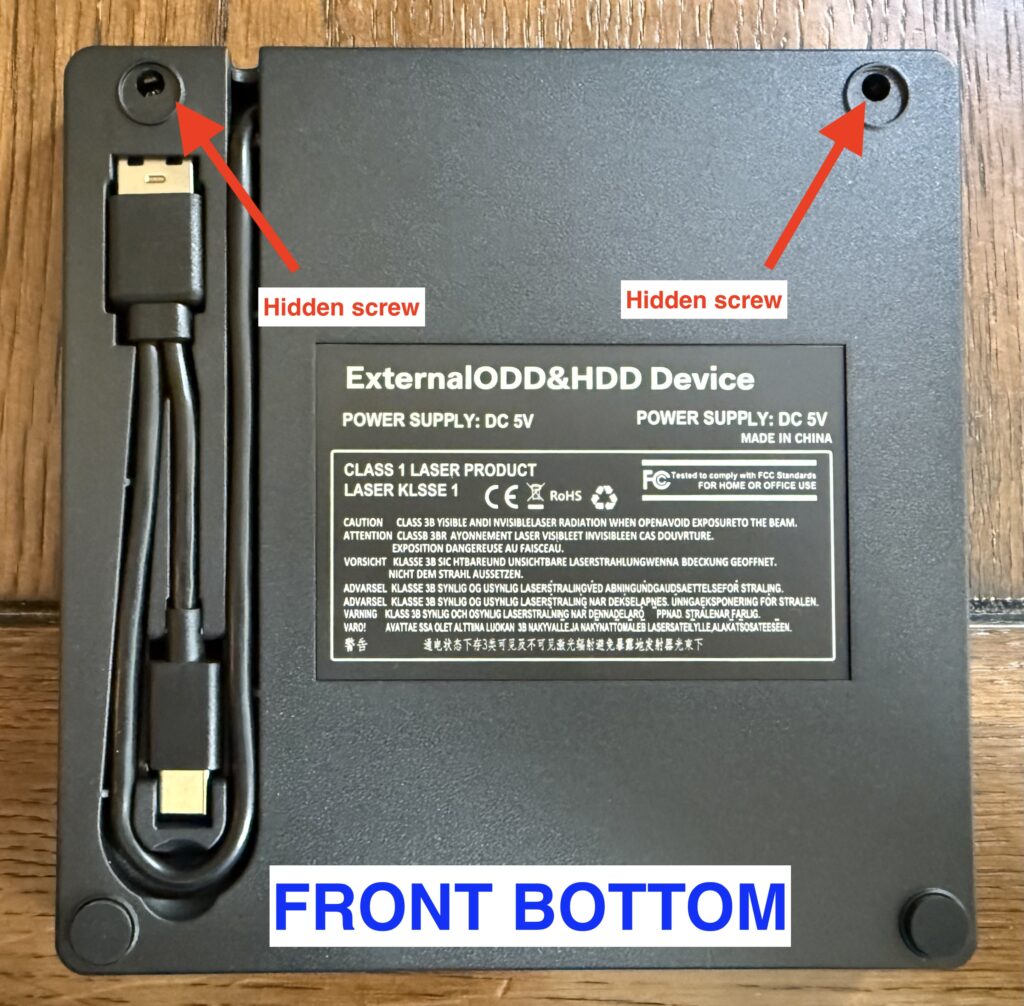
Star by flipping the enclosure over, and removing the 2 rubber feet opposite of the drive opening. Remove the screws that were hidden under the feet, and flip the enclosure over. If you didn’t see any screws, check the other 2 rubber feet. If you attempt to pry the drive open without removing the screws, it will break.
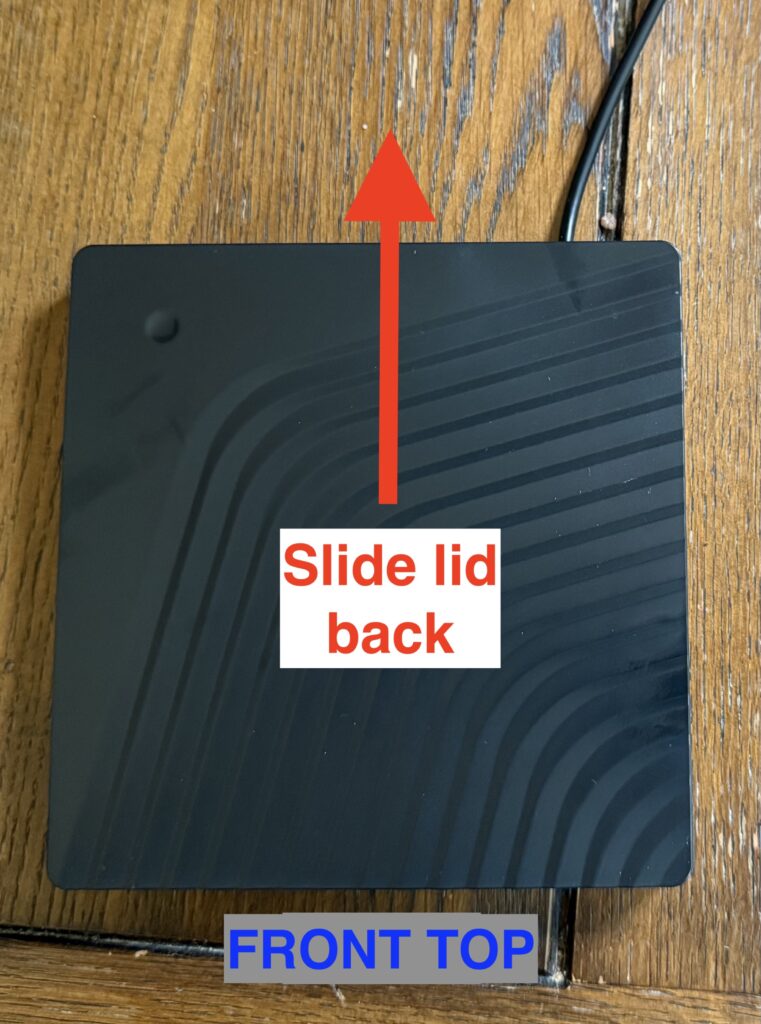
Now flip the enclosure over again, and slide the lid backwards about a millimeter away from the drive opening, and then lift up. The lid should release without any issue. Again, do not force it, as the plastic clips are quite brittle.
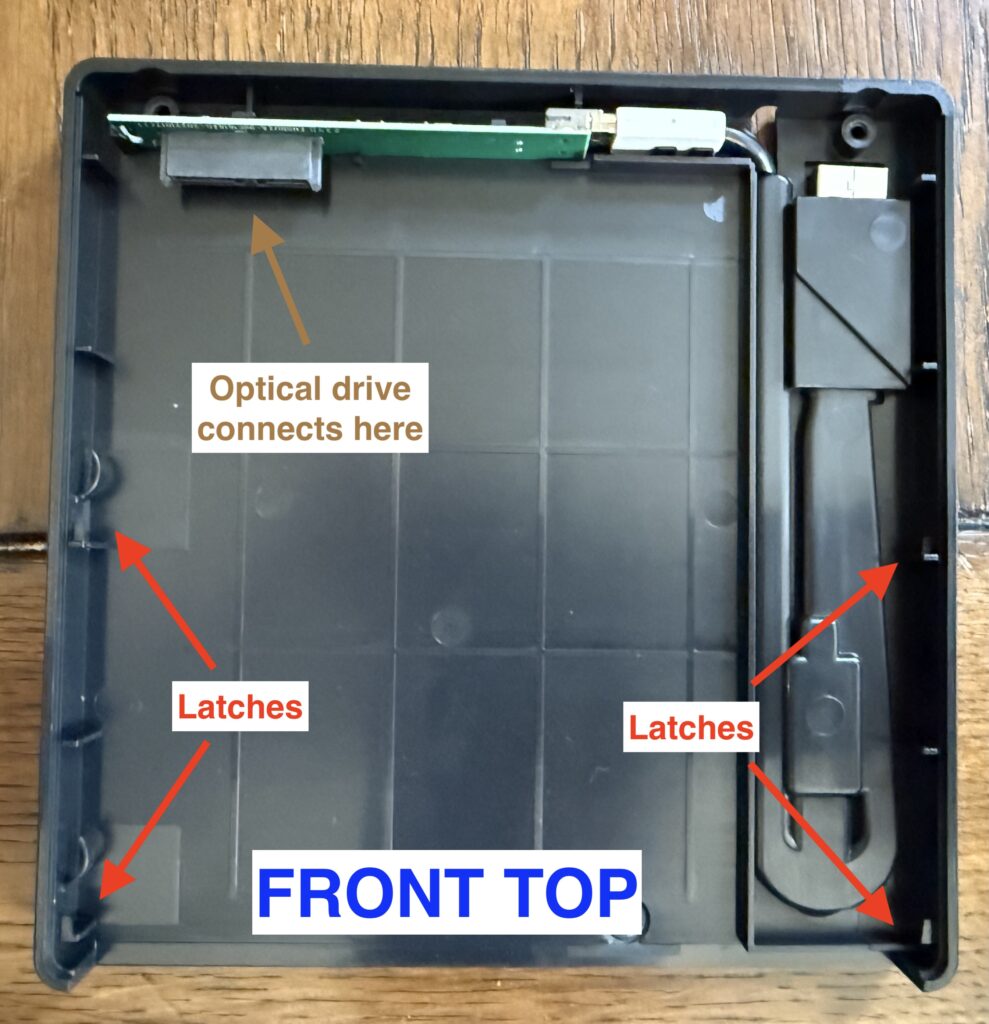
Once inside, the green controller board at the back (connected to the cable via a very USB 2.0-looking miniUSB connector). Plug this into the connector at the back of the drive, opposite from the bezel. There will be a small gap between the rear of the drive and the green circuit board, but they should be parallel, indicating the SATA connector (the big black rectangular one in the top left) went in straight. Once connected, wrangle the optical drive into place inside the enclosure, and make sure it sits flat.
If you left on the laptop bezel your drive shipped with, you may discover that it will only go in at an angle, or not at all. If this occurs, you may need to trim down the bezel with either a pair of flush cutters or some sandpaper. If you go the sandpaper route, it’s recommended you remove the bezel for adjustment, as to not get any plastic dust inside the sensitive drive components.
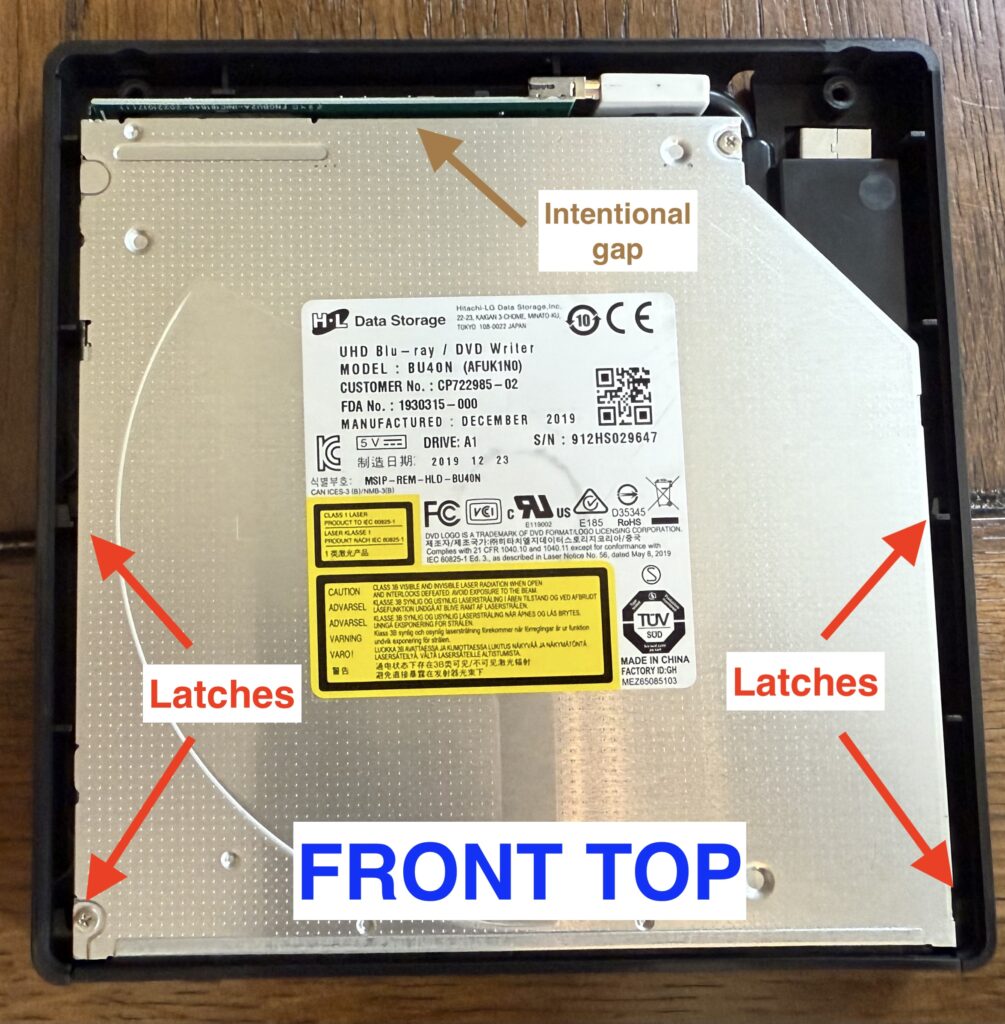
Once the drive is in place, reinstall the lid by placing it down and pulling forward. This is a finicky process, and you want to make sure all the latches are engaged and the lid is sitting flush before you re-install the screws on the bottom.
Connect it to your computer, and if it shows up, congratulations! You’ve assembled a fully functional external UHD drive all on your own! If it doesn’t show up, try wiggling the controller board a few times, or unplug and re-plug the drive a few times.
Leave a Reply